What better way to celebrate July if you’re a quilter than to sew a patriotic quilt for a veteran? Sewing, quilting and honoring our veterans with a Quilt of Valor® has always been important to me. I designed United, a free quilt pattern to give you the opportunity to honor a veteran. I have linked the Quilts of Valor Foundation website HERE. Please take the time to scroll through their website and learn how the foundation began and where it is now with over 300,000 quilts awarded. You can find a local group in your area HERE to donate your finished quilt to or you can contact a state coordinator HERE if there are no local groups near you. They would be honored to award your quilt to a wonderful veteran and register it with the foundation. If you are a QOVF member and choose to award your finished and labeled Quilt of Valor to a special veteran, you will report the award HERE. Please read on the foundation website the criteria for a veteran to receive a Quilt of Valor. If you would like to support the Quilts of Valor Foundation with membership, you can do that HERE.
The United Quilt was designed for beginner/intermediate quilters. Please email us if you have any questions about the pattern directions.
We would love to see pictures of the quilt you make by tagging us on your instagram post @catalinahomegrown or using the hashtag #CHGUnitedQuilt
My family on both my parents sides immigrated to the United States long before it was know as the United States. We will never know the circumstances of their immigration in the 1600’s but they made a life for themselves and their future generations. We are blessed to live in the United States and are honored to support our veterans through the Quilts of Valor Foundation.
It’s finally beginning to feel like fall at least in the mornings here… just barely but its right around the corner and these mid 80º days will be long gone soon enough! Which means it’s the perfect time to bust out a few fall inspired sewing projects before it sneaks up on us right?!?
I love using table runners in my house and I am always switching mine out to change the look of my table setting. I had this idea to sew up an organic shaped leaf runner that looked almost as if the leaves had just fallen on the table. So I set out to make it happen! I feel like it looks like it should be a lot harder then it actually was to make. I was surprised how quickly I moved thought the project considering I was problem solving and designing as I went. Once I finished, I fell in LOVE with how it turned out and the neutral white is the perfect choice for our home. It says fall without screaming it.
You do not need to use white if that look won’t match your home. You could easily decide to use a mixture of fall solids or printed fabrics, you could use scraps up, or even try a ombre palette instead and it would be equally pretty! (Ugh! Now I am wanting to make another geez…)
1yd White Linen Look Alike Fabric (JoAnn Fabrics) Brown Thread Frixion Pen Fabric Scissors Fabric Glue (I used Elmers white glue since thats what I had on hand) Pins Iron Scissors
♥ First, cut out your leaf pattern pieces (You can use all 4 shapes or just 1 or 2 whatever you decide. I ended up using them all).
♥Next, trace the leaves onto your folded fabric using your Frixion pen
♥Once you have traced the leaves cut them apart into smaller more manageable pieces to cut (each leaf has 2 pieces of fabric) This will make cutting the actual leaf shape easier
♥Next, pin the 2 pieces of fabric together for each leaf and cut along the Frixion pen lines.
♥Then, using the brown thread “draw” an outline of the leaf about a 1/4in. in from the edge using your sewing machine Pro Tip: Its ok if this is not perfect! I repeat it’s ok if it’s not perfect! I actually purposely tried to make mine a little “messy” after a few leaves you’ll get into a rhythm and it’s relatively simple.
♥Next, using brown thread still, sew the veins of the leaves by just loosely mapping out what you feel looks like leaf veins. Think “Y” and “V” shapes.
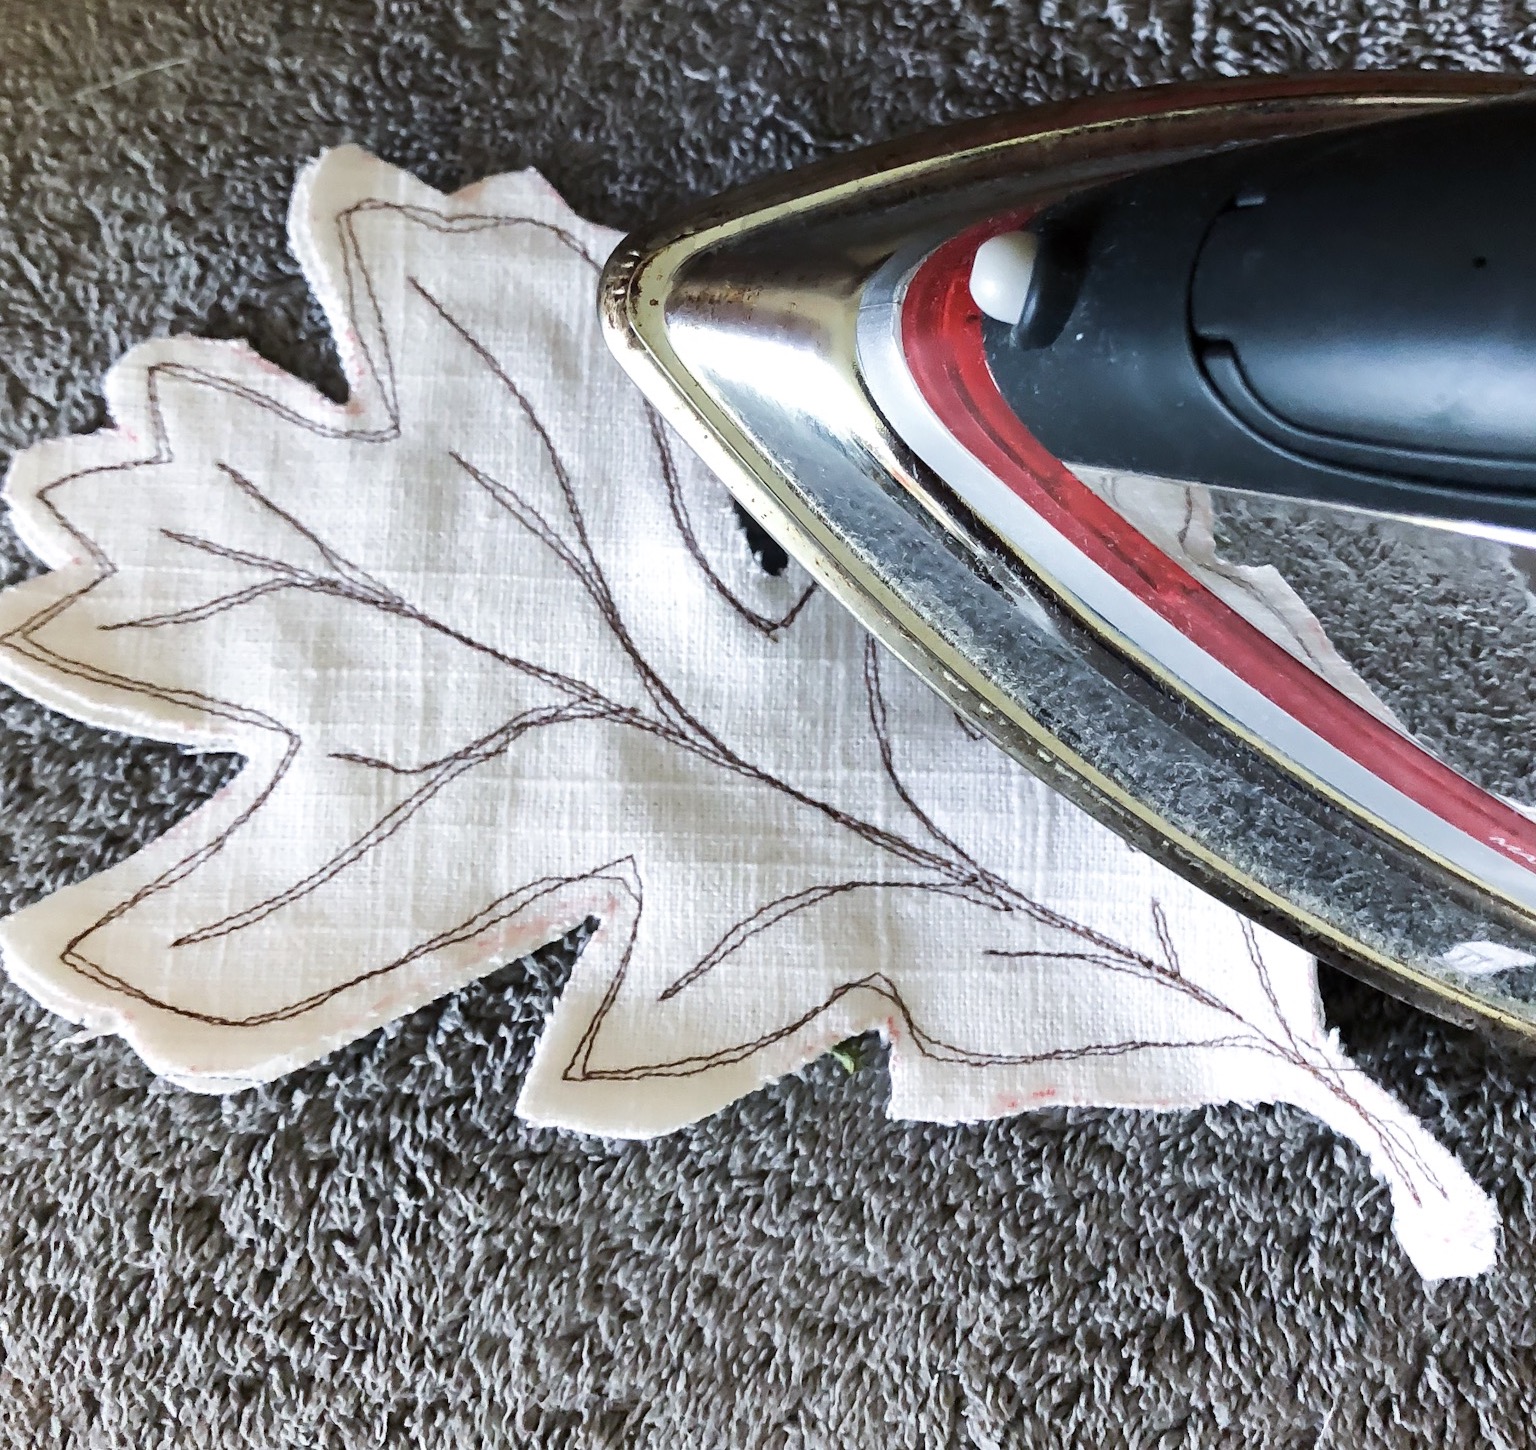
♥Once your leaves are all sewn press them with your iron to remove any leftover Frixion pen lines
♥Then, used your fingernail to scrap at the edges of the leaves to fray them. This takes a little bit of time and yes was messy because of my fabric choice. Pro Tip: Turn on last weeks episode of Bachelor in Paradise to review all the drama as you work. The time will fly by 😉
♥Once all of your leaves are sewn and frayed clear a flat surface and arrange them how you want them to lay on your table. Making sure to overlap them a little.
♥Next, take your fabric glue or Elmers glue and tack down the over lapping pieces. As you do this put a pin in those places so you don’t forget where you need to sew. It also gives extra stability since you will have to pick this up and move it to your machine.
♥Once you let the glue sit for a few minutes, go ahead and carefully transfer the runner to your sewing machine to piece together.
♥In order to attach the leaves sew directly onto the brown lines you had already made anywhere there is a pin. Pro Tip: Try to tack down as much of the leaves as possible in these areas. This might mean you have to lift up the leaves to see where there are more brown lines to stitch over.
♥Once you have sewn down all your leaves. Trim any extra threads and give it good press.
♥Yay!!! Great work! Now go style your new runner in your home and snap a pic to share so we can see!!! Tag us @catalinahomegrown so we don’t miss it. We love a little home decor inspo too 🙂
Last week we posted about Mister Domestics Project Party and all the fun makes we got to create here. One of those were reusable paper towels, something that had been on our radar for quite some time. The only thing stopping us were using the little plastic snaps. Now that we actually made them it seems funny since they were SO EASY to do!!! I actually can’t wait to try them out on MORE projects!
Since we loved how ours turned out we wanted to make a little tutorial for you so that you could whip up your own. This is a great beginner sewing project and you can easily sew up a roll in a weekend!
Materials you will need:
-Cotton Fabric (we used scraps) (Dimentions 6.5×11.5in) -Plastic snaps (4 snaps per towel) -Plastic snap pliers -Thread -Terry Cloth fabric (1yd makes 12) -Ruler -Rotary Cutter -Frixion Pen
Here how to do it:
1. First you will need to cut your cotton fabric and your terry cloth into 6.5×11.5in size rectangles. I suggest using a rotary cutter for both but it is very helpful for the terry cloth since its messy and you can easily make a clean straight line.
Pro tip: Use a lint roller when you are done to clean up the left over fuzzies on your cutting table.
2. Next, sew your cotton and terry fabric rectangles right sides together using a 1/4in. seam allowance and leaving a 1.5 in. gap on one of the sides so that you can flip the fabric right side out.
3. Turn your fabric right side out and finger press the seams flat. You can use a Purple Thang tool to help you get the corners pointy.
4. Now press with an iron to ensure flatness and straight edges.
5. Next, sew a 1/4in. seam around the edges off each rectangle with coordinating thread since you will see it. This will also close your opening where you turned your fabric so make sure it is ironed so that the raw edge is turned under.
6. You will then need to mark with your Frixion pen a diagonal line going from corner to corner which will form an “X” on each rectangle Sew over your lines quilting the 2 pieces of fabric together for extra stability. Press with an iron to remove the Friction pen lines when done
7. Next, you need to attach the plastic snaps begin by using the sharp tool that comes in the snap kit to poke holes in each of the corners.
Pro tip: Along your corners will be thicker since the seam allowance is there so punch the holes slightly down from the corners roughly 3/4in. so that you are only punching through 2 layers of fabric not 4. This will make it much easier when you begin to attach your snaps as they can not go through super thick fabric. You can use a ruler to ensure the same measurement on each corner so that the snaps line up evenly
8. You will then follow the directions in your snap kit on how to attach the snaps, alternating each side of the paper towel with the opposite snaps (since they are male and female) in order to allow them to snap together once rolled on the paper towel.
Pro Tip: We lined our snaps up first in two lines so that we could easily grab the ones we needed since they are so little and hard to identify. It saved us time and confusion.
9. Finally, attach all your fabric pieces together by snapping them to make a long strip and roll them around a paper towel holder.
10. Hurray you are done!! Now go enjoy your new un-paper towels!
Just throw them it the wash once you use one and snap it back onto the roll when clean! SOO EASY!!!
Enjoy!!! Be sure to tag us at @Catalinahomegrown so we can see all your makes!